

I am Making this thread to help answer some questions about the POD and any other general smarty questions you might have. I will continue to update the front page of this thread as the need arises.
Attention: It is imperative that when loading, unloading, or updating the Smarty software on your truck that the truck have optimal battery voltage available. This is true for any programmer for the ECM. The dealership actually has there techs use a battery charger while uploading the ECM. If it is cold outside or you have not started and driven the truck in the last 24 hours it is avisable to start the truck and either drive it or idle it (drive is better) until the truck has reached operating temperature. Then you can upload the Smarty knowing that the batteries have the best charge and that the grid heater will not try to come on and put a big drain on the batteries. If your are not sure the best bet is just drive it until it is up to temp then do your changes.
Having problems updating your smarty? Please look here. Need Help with a Smarty, Look inside
![Image]()
First of all the POD: Power On Demand
How much will it cost? It will be a free internet upgrade for the smarty.
The POD function is a way of derating or lowering the horsepower on your truck on the fly from 99 to 0.
The POD function is not a linear function. For example if you set your truck on Sw#9 and set your POD to 50 you are not running at 50% (the POD numbers do not correlate to a percentage at all). If you adjust your Sw to #5 the POD will function differently than it did when on Sw#9. For your information running on lower SW's will cause you to have to keep your POD higher to have usable horsepower. Settings below 50 need to be tested on back roads and not in traffic. This is will take some testing to find a power level that you are comfortable running. Please feel free to post some of your favorite settings in this thread if you would like to.
REVO settings:
Your REVO settings are not adjustable on the fly. They still require you to download a SW# to make changes to the REVO.
Transmission shifting:
When running on sw#6,7,8 or #9 and having the POD set to a lower level will cause your transmission to have delayed shifts. It may even become necessary to let off the throttle to allow the truck to shift. This can actually be a good thing. It allows you to control the shifting of the transmission with just your foot.
New Stock Software: When released with the POD.
The Sw#0 is now true stock software. Meaning just like it rolled off the dealership lot minus some of the exhaust problems. This also caused the REVO defaults to change to #1 instead of #2. This is important for anyone that wants to run added timing, Torque Management, or VGT to properly set it in their smarty. Broncohound and Dad2Bike have done some thorough testing of the stock software. I am sure if you post a question in here they will pop in and answer it or you can PM them directly.
When running the standard S-67 Smarty ( DPF intact ):
The need for keeping the EGR unplugged is not necessary. When running the S-67 software the program takes care of the EGR by commanding it to 0% at all times. This means that you get the benifit of running with the EGR unplugged, but still have no codes. So plug those egr valves back in when running the S-67.
Clarification of the Smarty Catcher power levels and Revo settings:
Catcher levels
Smarty S-67 Software Levels #0 – #9
SW# 0 : Stock Power (with new software release)
SW# 1 : 30 Hp with raised Timing
SW# 2 : 60 HP ( Stock Timing )
SW# 3 : 60 HP Like # 2 + added Timing
SW# 4 : 90 HP ( Stock Timing )
SW# 5 : 90 HP Like # 4 + added Timing
SW# 6 : 130 HP ( stock Timing)
SW# 7 : 130HP Like # 6 + added Timing
SW# 8 : 200 HP ( stock Timing)
SW# 9 : 200 HP Like # 8 + added Timing
Revo Settings
On SW# 0 all revo settings will be at #1 if using default settings.
On all Odd SW#'s all revo settings will be at #2 if using default settings.
On all Even SW#'s all revo settings will be at #2 except timing which will be at #1 if using default settings.
Injection Timing:
# 0 - Default
# 1 - Stock
# 2 - mild
# 3 – moderate ( more timing advance than # 2 )
# 4 – aggressive ( more timing advance than level # 3 )
Torque Management:
# 0 - Default
# 1 – Stock
# 2 – Mild
# 3 – Moderate ( after market clutch / AT Transmission recommended! )
# 4 - Wild ( after market clutch / AT Transmission NEEDED! )
Rail pressure:
# 0 - Default
# 1 - Stock
# 2 - Mild
# 3 – Moderate
# 4 – Wild* (after market injectors are a MUST)
Variable Geometry Turbo Setting:
# 0 - Default
# 1 - Stock
# 2 - Moderate (Good mix of power and fuel economy)
# 3 – Towing
# 4 – Wild (Fuel economy will suffer with this setting)
For Clarification: VGT Power settings go in order from least to greatest in this order #1,#3,#2,and #4. This has not changed in the POD update.
How to connect the smarty for POD and share your OBD2 port with an insight or other gauges. (PMT for Dad2Bike)
I am testing some new cable ideas. I will provide links to the cables I have ordered and let everyone know how I like them after they are installed and I am using them. One is a standard y cable and a right hand adapter. The other cable is a little more entailed you will have to check them out and see what you think. I will post details on results. You may get an error when sharing the OBD2 port with the smarty and other device. You will just have to enter the POD setting again on the smarty. Here are the links to the cables.
Standard y cable: Cable, J1962M to 2-J1962F, Y-Cable, 1ft - OBD II Cables - Cables - OBD2Cables.com
Right hand adapter cable: Cable, J1962M Right Angle to J1962F, 2ft - OBD II Cables - Cables - OBD2Cables.com
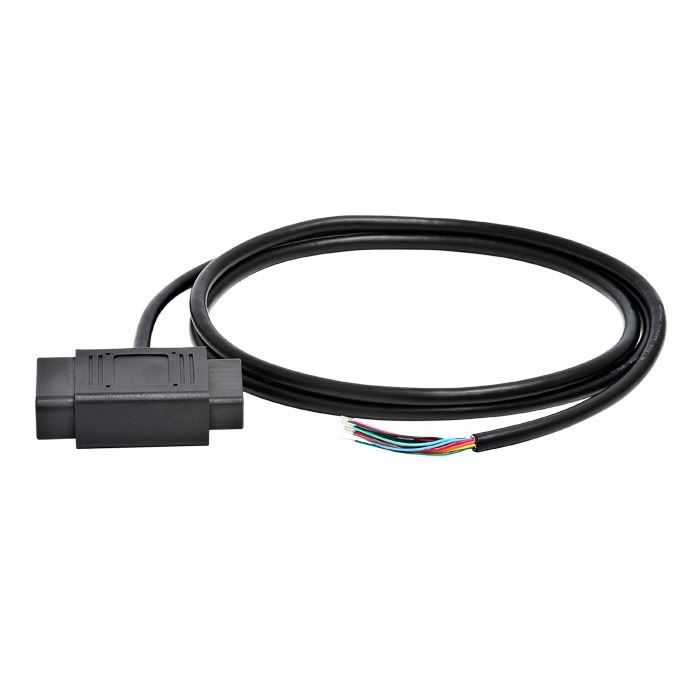
Here is my latest adventure with the cabling.
Cable, J1962M/F Pass-thru to Open End, 5ft - OBD II Cables - Cables - OBD2Cables.com
![Image]()
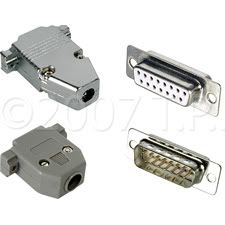
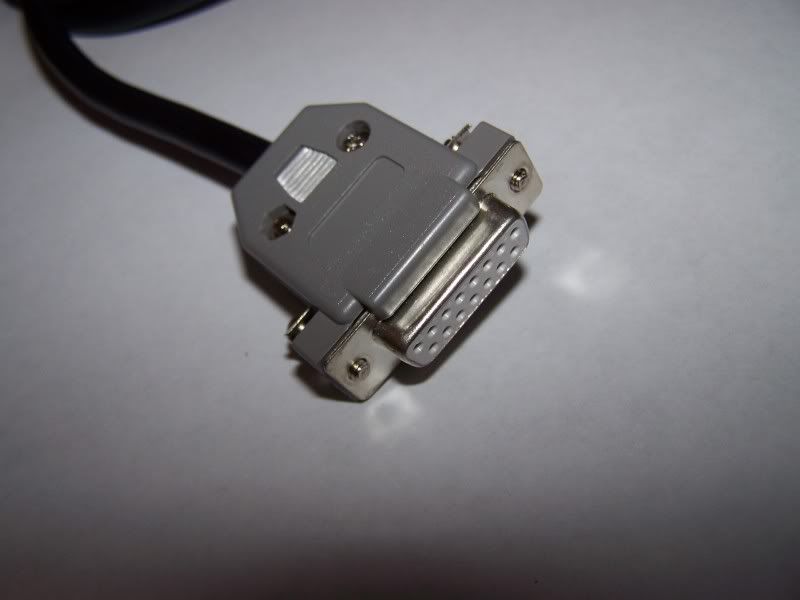
Here is the female connector that I am using with the housings.
TecNec Cables & Connectors TecNec 15-Pin D-Sub Connector Male and Female Body Inserts 15-Pin D-Sub Connectors at Markertek.com
![Image]()
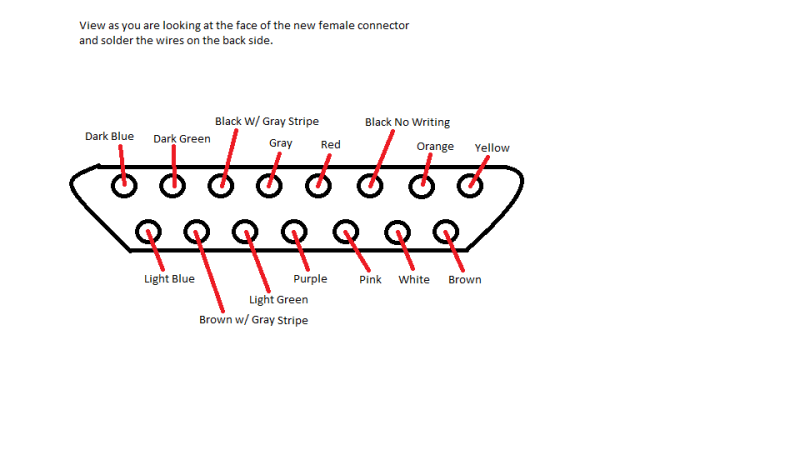
The corresponding pin out of the 15 pin connector to the cable is as follows. As you are looking at the face of the 15 pin connector.
![Image]()
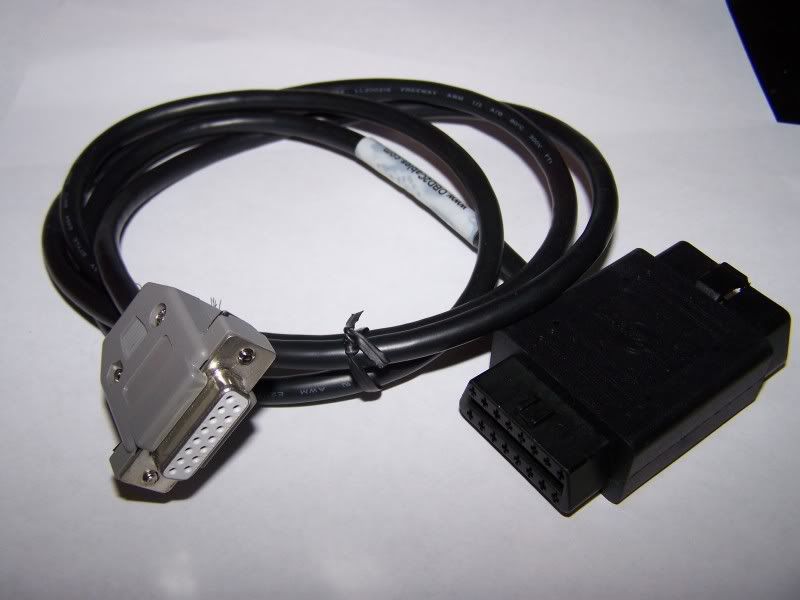
Here is the finished cable.
![Image]()
![Image]()
If anyone has any questions please feel free to ask.
Andy
My personal Experience:
I think that the POD is utilized the best by loading a higher SW# like 6,7,8,9 and then using the POD to lower the power to a level you are comfortable driving with everyday or as weather permits.
I am personally running Sw#8 and all REVO to #2. I adjust my POD to my liking as I am driving. When it is raining or snowing I lower the level to keep the truck more manageable.
Windows 7 64 bit operation:
When using Windows 7 the smarty downloader may not function properly. If will not function properly you can rememdy this situation by downloading the smarty usb downloader and then go to where you downloaded the file to and right click on the smarty icon (looks just like a smarty). Then choose properties. Click on the compatibility tab. Then check the box in front of the words "Run this program in compatibility mode for:" then using the drop down box choose "Windows XP (Service Pack 2)" this will allow the program to function properly.
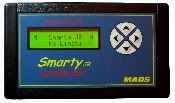
Smarty Jr. Information
![Image]()
Straight from Marco himself.
Basically, JR's software's will be level # 0 ; # 1; # 3 and # 5 of the S67.
As dispalyed on the smarty jr screen.
Stock
MPG
TOWING
PERFORMANCE
Smarty Jr's optional parameters are as follows.
Torque
The Torque selection can be programmed
#0 Default
#1 OEM Stock Torque Management
#2 Mild
#3 More Aggressive than #2
#4 More Aggressive than #3
With the Default torque setting, Smarty chooses it according to the current CaTCHER level.
Injection Timing
The Timing selection can be programmed
#0 Default
#1 OEM Stock Timing
#2 Default low Smoke Timing
#3 More Timing Advance Than #2
#4 More Timing Advance Than #3
With the Default timing setting, Smarty chooses it according to the current CaTCHER level.
http://i26.photobucket.com/albums/c109/onelongshot/IMG_0001-1.jpg
![Image]()
Will have the POD function.
CaTCHER software's inside
Standard Emission Compatible or Deletes Compatible with ME software.
Four different performance levels: Stock with deletes / 40 / 70 / 100 hp
Improved fuel economy
Optimized drivability
Fastest download in the industry, up to three times faster than
the competition, a typical ECM update takes about 3.5 to 5
minutes, depending on the truck model
ABS tire height updates in just few seconds from 22,5" to 44"
Manual High-Idle is enabled in all softwares
Reads Diagnostic Trouble Codes in plain text
No tools required, no fuses to pull
USB built in for simple updates from internet
Easy installation
Reliable, it works off your OEM hardware
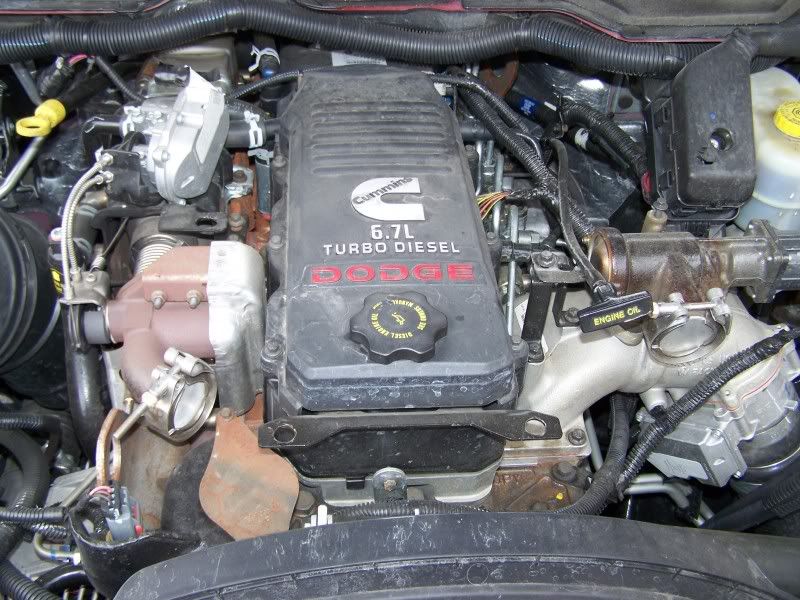
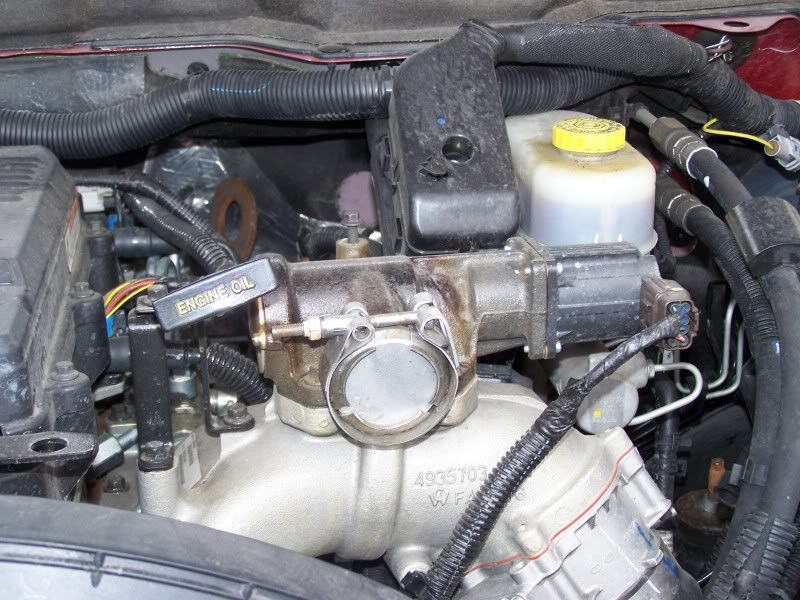
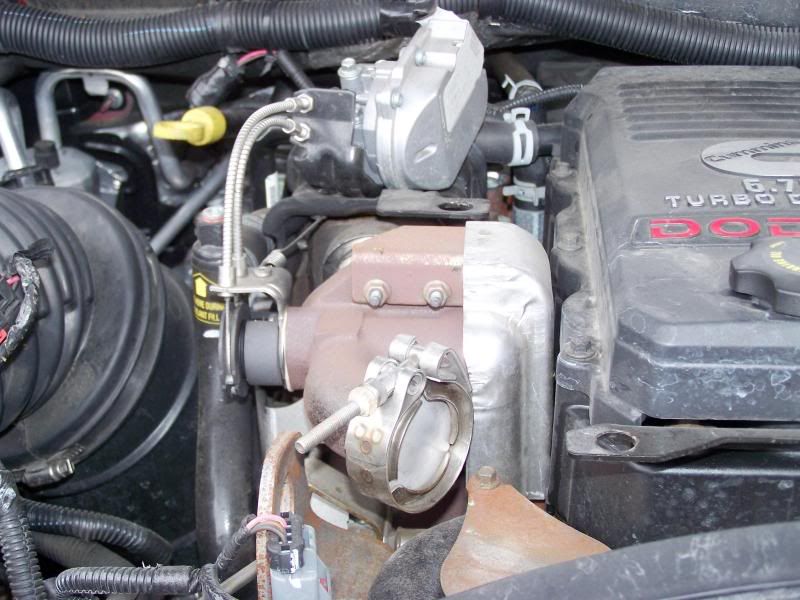
This is how my EGR is taken care of.
I used two 2" circles of 1/8" thick aluminum plate to make the block off plates.
![Image]()
![Image]()
![Image]()
Smarty versions, some data about the versions, and a download for them.
Smarty 14me
This has aggressive timing and produced the best mileage for me. Catcher #0 is half power and some people have the overhead message with this version.
S67V610BR14ME.7z
Smarty 18me
This is the first version to have the lower timing, Catcher #0 is stock power, and this version is the first for POD
S67PV615CR18ME.7z
Smarty 23me
This version has the correted boot loader for the newer version and it has the fix for the overhead messages.
S67V618Ap23ME.7z
If you would like any versions of Smarty please feel free to ask away.
I have a vast library.
General Smarty Questions, Answers, and Information.
Feel free to ask questions in this thread about Smarty, Smarty Jr.,or the Smarty POD.
1. You do not need to return smarty to stock to upgrade to the POD or any other softwares. Just update the smarty with the new software then load on the truck and go.
2. You need to remember to unplug your smarty when you get out of the truck. The smarty will stay powered up and draw off of the batteries until it is unplugged.
3. When running the stock program be carefull using the POD function as it can limit the power of the truck fairly fast. Dad2Bike can attest to this.
4. If you are using windows 7 it may be necessary to run the Smarty downloader program in compatibility mode. I had to do this on my computer. It is a HP 64 bit system. I just right clicked on the smarty icon and chose the compatibility tab and then chose to run it in a windows xp setup. After this the program functioned perfectly.
5. The Smarty has your stock program loaded in the Smarty. It is loaded in the Smarty when you update the Smarty from the computer. When loading the Smarty for the first time you will be brought up to the latest Chrysler flash available. This is because Smarty is loading a fresh stock program on your truck and not saving your current program from your truck to the Smarty. This is part of the reason why the smarty loads so much faster than the competittion.
Other information as it comes about.
Please feel free to post suggestions or information you would like to see added to this first post and I will make sure it gets added.
Andy
Attention: It is imperative that when loading, unloading, or updating the Smarty software on your truck that the truck have optimal battery voltage available. This is true for any programmer for the ECM. The dealership actually has there techs use a battery charger while uploading the ECM. If it is cold outside or you have not started and driven the truck in the last 24 hours it is avisable to start the truck and either drive it or idle it (drive is better) until the truck has reached operating temperature. Then you can upload the Smarty knowing that the batteries have the best charge and that the grid heater will not try to come on and put a big drain on the batteries. If your are not sure the best bet is just drive it until it is up to temp then do your changes.
Having problems updating your smarty? Please look here. Need Help with a Smarty, Look inside

First of all the POD: Power On Demand
How much will it cost? It will be a free internet upgrade for the smarty.
The POD function is a way of derating or lowering the horsepower on your truck on the fly from 99 to 0.
The POD function is not a linear function. For example if you set your truck on Sw#9 and set your POD to 50 you are not running at 50% (the POD numbers do not correlate to a percentage at all). If you adjust your Sw to #5 the POD will function differently than it did when on Sw#9. For your information running on lower SW's will cause you to have to keep your POD higher to have usable horsepower. Settings below 50 need to be tested on back roads and not in traffic. This is will take some testing to find a power level that you are comfortable running. Please feel free to post some of your favorite settings in this thread if you would like to.
REVO settings:
Your REVO settings are not adjustable on the fly. They still require you to download a SW# to make changes to the REVO.
Transmission shifting:
When running on sw#6,7,8 or #9 and having the POD set to a lower level will cause your transmission to have delayed shifts. It may even become necessary to let off the throttle to allow the truck to shift. This can actually be a good thing. It allows you to control the shifting of the transmission with just your foot.
New Stock Software: When released with the POD.
The Sw#0 is now true stock software. Meaning just like it rolled off the dealership lot minus some of the exhaust problems. This also caused the REVO defaults to change to #1 instead of #2. This is important for anyone that wants to run added timing, Torque Management, or VGT to properly set it in their smarty. Broncohound and Dad2Bike have done some thorough testing of the stock software. I am sure if you post a question in here they will pop in and answer it or you can PM them directly.
When running the standard S-67 Smarty ( DPF intact ):
The need for keeping the EGR unplugged is not necessary. When running the S-67 software the program takes care of the EGR by commanding it to 0% at all times. This means that you get the benifit of running with the EGR unplugged, but still have no codes. So plug those egr valves back in when running the S-67.
Clarification of the Smarty Catcher power levels and Revo settings:
Catcher levels
Smarty S-67 Software Levels #0 – #9
SW# 0 : Stock Power (with new software release)
SW# 1 : 30 Hp with raised Timing
SW# 2 : 60 HP ( Stock Timing )
SW# 3 : 60 HP Like # 2 + added Timing
SW# 4 : 90 HP ( Stock Timing )
SW# 5 : 90 HP Like # 4 + added Timing
SW# 6 : 130 HP ( stock Timing)
SW# 7 : 130HP Like # 6 + added Timing
SW# 8 : 200 HP ( stock Timing)
SW# 9 : 200 HP Like # 8 + added Timing
Revo Settings
On SW# 0 all revo settings will be at #1 if using default settings.
On all Odd SW#'s all revo settings will be at #2 if using default settings.
On all Even SW#'s all revo settings will be at #2 except timing which will be at #1 if using default settings.
Injection Timing:
# 0 - Default
# 1 - Stock
# 2 - mild
# 3 – moderate ( more timing advance than # 2 )
# 4 – aggressive ( more timing advance than level # 3 )
Torque Management:
# 0 - Default
# 1 – Stock
# 2 – Mild
# 3 – Moderate ( after market clutch / AT Transmission recommended! )
# 4 - Wild ( after market clutch / AT Transmission NEEDED! )
Rail pressure:
# 0 - Default
# 1 - Stock
# 2 - Mild
# 3 – Moderate
# 4 – Wild* (after market injectors are a MUST)
Variable Geometry Turbo Setting:
# 0 - Default
# 1 - Stock
# 2 - Moderate (Good mix of power and fuel economy)
# 3 – Towing
# 4 – Wild (Fuel economy will suffer with this setting)
For Clarification: VGT Power settings go in order from least to greatest in this order #1,#3,#2,and #4. This has not changed in the POD update.
How to connect the smarty for POD and share your OBD2 port with an insight or other gauges. (PMT for Dad2Bike)
I am testing some new cable ideas. I will provide links to the cables I have ordered and let everyone know how I like them after they are installed and I am using them. One is a standard y cable and a right hand adapter. The other cable is a little more entailed you will have to check them out and see what you think. I will post details on results. You may get an error when sharing the OBD2 port with the smarty and other device. You will just have to enter the POD setting again on the smarty. Here are the links to the cables.
Standard y cable: Cable, J1962M to 2-J1962F, Y-Cable, 1ft - OBD II Cables - Cables - OBD2Cables.com
Right hand adapter cable: Cable, J1962M Right Angle to J1962F, 2ft - OBD II Cables - Cables - OBD2Cables.com
Here is my latest adventure with the cabling.
Cable, J1962M/F Pass-thru to Open End, 5ft - OBD II Cables - Cables - OBD2Cables.com
Here is the female connector that I am using with the housings.
TecNec Cables & Connectors TecNec 15-Pin D-Sub Connector Male and Female Body Inserts 15-Pin D-Sub Connectors at Markertek.com
The corresponding pin out of the 15 pin connector to the cable is as follows. As you are looking at the face of the 15 pin connector.
Here is the finished cable.
If anyone has any questions please feel free to ask.
Andy
My personal Experience:
I think that the POD is utilized the best by loading a higher SW# like 6,7,8,9 and then using the POD to lower the power to a level you are comfortable driving with everyday or as weather permits.
I am personally running Sw#8 and all REVO to #2. I adjust my POD to my liking as I am driving. When it is raining or snowing I lower the level to keep the truck more manageable.
Windows 7 64 bit operation:
When using Windows 7 the smarty downloader may not function properly. If will not function properly you can rememdy this situation by downloading the smarty usb downloader and then go to where you downloaded the file to and right click on the smarty icon (looks just like a smarty). Then choose properties. Click on the compatibility tab. Then check the box in front of the words "Run this program in compatibility mode for:" then using the drop down box choose "Windows XP (Service Pack 2)" this will allow the program to function properly.
Smarty Jr. Information
Straight from Marco himself.
Basically, JR's software's will be level # 0 ; # 1; # 3 and # 5 of the S67.
As dispalyed on the smarty jr screen.
Stock
MPG
TOWING
PERFORMANCE
Smarty Jr's optional parameters are as follows.
Torque
The Torque selection can be programmed
#0 Default
#1 OEM Stock Torque Management
#2 Mild
#3 More Aggressive than #2
#4 More Aggressive than #3
With the Default torque setting, Smarty chooses it according to the current CaTCHER level.
Injection Timing
The Timing selection can be programmed
#0 Default
#1 OEM Stock Timing
#2 Default low Smoke Timing
#3 More Timing Advance Than #2
#4 More Timing Advance Than #3
With the Default timing setting, Smarty chooses it according to the current CaTCHER level.
http://i26.photobucket.com/albums/c109/onelongshot/IMG_0001-1.jpg

Will have the POD function.
CaTCHER software's inside
Standard Emission Compatible or Deletes Compatible with ME software.
Four different performance levels: Stock with deletes / 40 / 70 / 100 hp
Improved fuel economy
Optimized drivability
Fastest download in the industry, up to three times faster than
the competition, a typical ECM update takes about 3.5 to 5
minutes, depending on the truck model
ABS tire height updates in just few seconds from 22,5" to 44"
Manual High-Idle is enabled in all softwares
Reads Diagnostic Trouble Codes in plain text
No tools required, no fuses to pull
USB built in for simple updates from internet
Easy installation
Reliable, it works off your OEM hardware
This is how my EGR is taken care of.
I used two 2" circles of 1/8" thick aluminum plate to make the block off plates.
Smarty versions, some data about the versions, and a download for them.
Smarty 14me
This has aggressive timing and produced the best mileage for me. Catcher #0 is half power and some people have the overhead message with this version.
S67V610BR14ME.7z
Smarty 18me
This is the first version to have the lower timing, Catcher #0 is stock power, and this version is the first for POD
S67PV615CR18ME.7z
Smarty 23me
This version has the correted boot loader for the newer version and it has the fix for the overhead messages.
S67V618Ap23ME.7z
If you would like any versions of Smarty please feel free to ask away.
I have a vast library.
General Smarty Questions, Answers, and Information.
Feel free to ask questions in this thread about Smarty, Smarty Jr.,or the Smarty POD.
1. You do not need to return smarty to stock to upgrade to the POD or any other softwares. Just update the smarty with the new software then load on the truck and go.
2. You need to remember to unplug your smarty when you get out of the truck. The smarty will stay powered up and draw off of the batteries until it is unplugged.
3. When running the stock program be carefull using the POD function as it can limit the power of the truck fairly fast. Dad2Bike can attest to this.
4. If you are using windows 7 it may be necessary to run the Smarty downloader program in compatibility mode. I had to do this on my computer. It is a HP 64 bit system. I just right clicked on the smarty icon and chose the compatibility tab and then chose to run it in a windows xp setup. After this the program functioned perfectly.
5. The Smarty has your stock program loaded in the Smarty. It is loaded in the Smarty when you update the Smarty from the computer. When loading the Smarty for the first time you will be brought up to the latest Chrysler flash available. This is because Smarty is loading a fresh stock program on your truck and not saving your current program from your truck to the Smarty. This is part of the reason why the smarty loads so much faster than the competittion.
Other information as it comes about.
Please feel free to post suggestions or information you would like to see added to this first post and I will make sure it gets added.
Andy


 eelout


