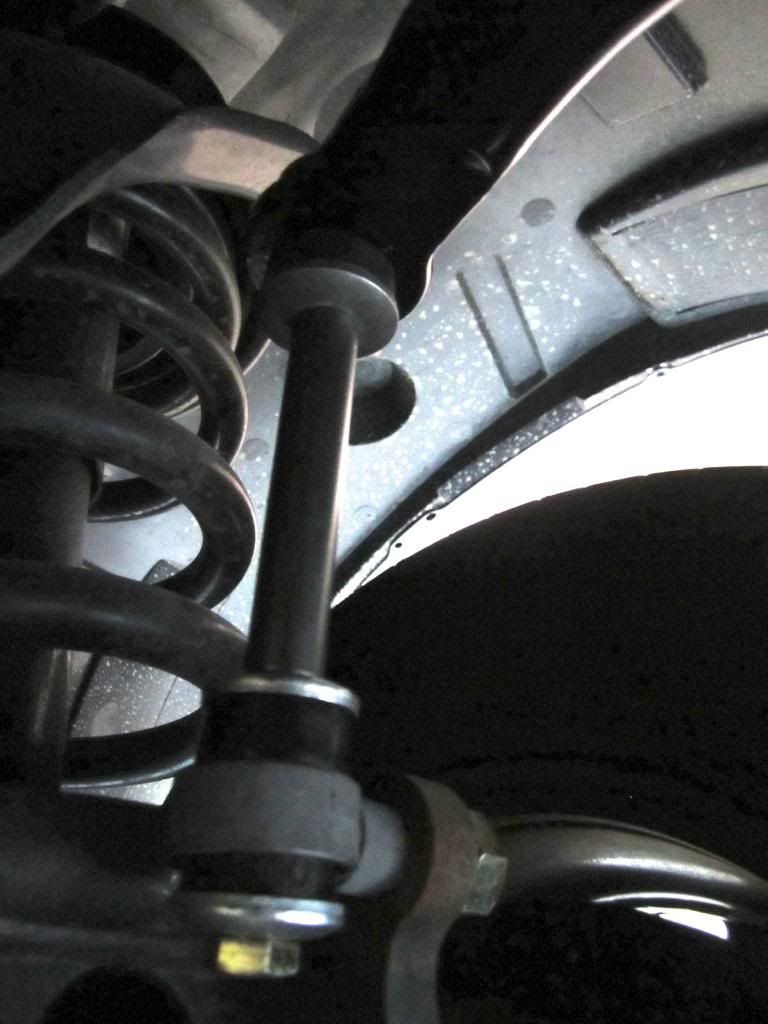

Decided to do a write up on a popular upgrade on the front end. Most just install a damper, or just a brace. I installed a new PSC steering brace, Bilstein 7100 steering damper, Thuren steering damper clamp, Energy Suspension sway bar bushing, and Maxx Suspension end links.
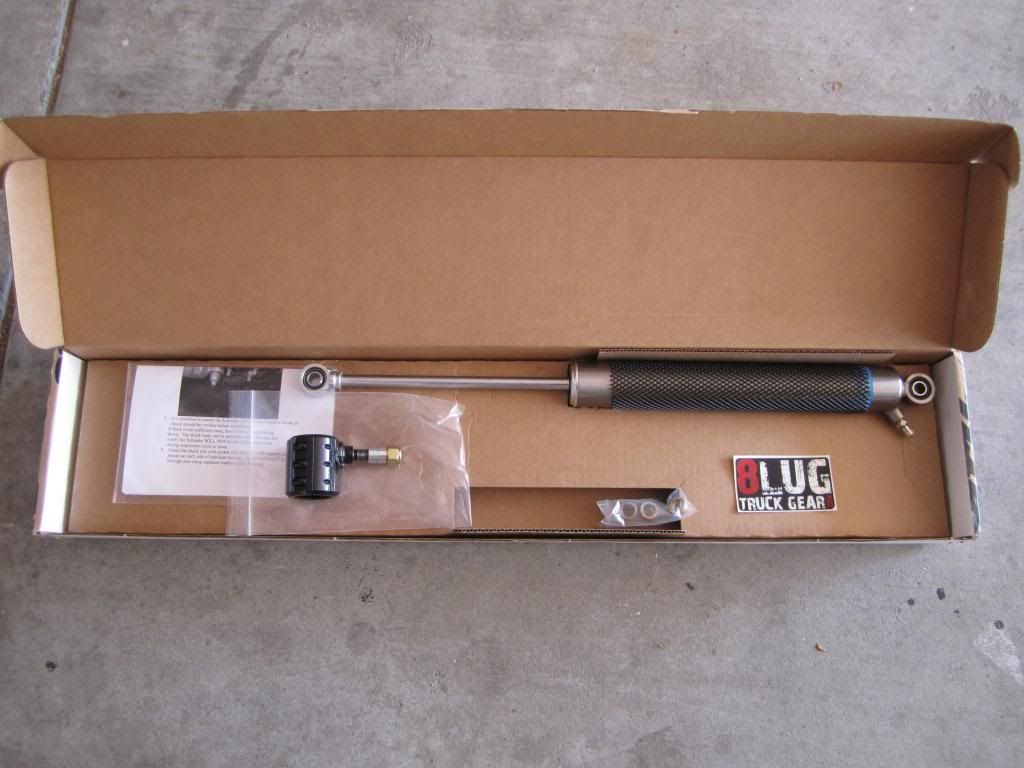
Bilstein 7100 steering damper with Thuren damper clamp, got the damper from Carli Dodge Ram Steering Stabilizer - Bilstein 7100 Series Steering Stabilizer for Dodge Ram 2500/3500 and got the clamp direct from Thuren Thuren Fabrication-products
![Image]()
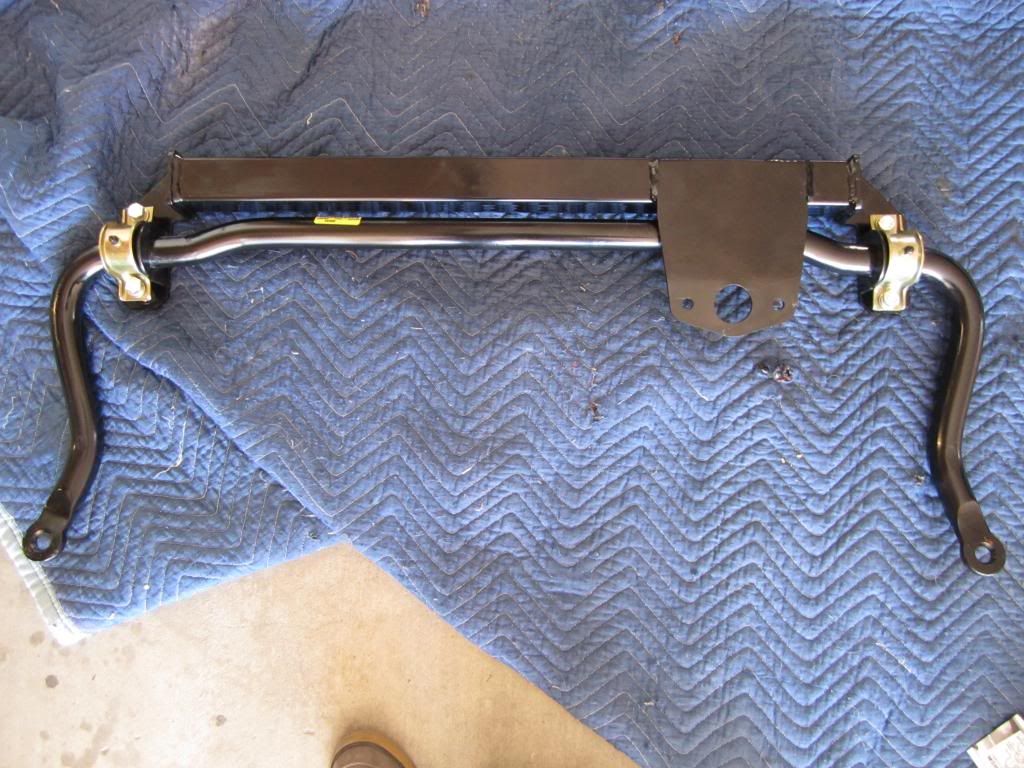
PSC steering brace, direct from PSC Poly Performance JEEP/TRUCK & BUGGY::Steering::Steering Box Braces & Brackets: odge::Synergy Suspension 94-11 Dodge 4X4 Steering Box Brace 4WD 1500, 2500, 3500 - 4X4 Off-Road Parts, JK Synergy Suspension Systems, Fox Racing Shox, Beard, CNC
![Image]()
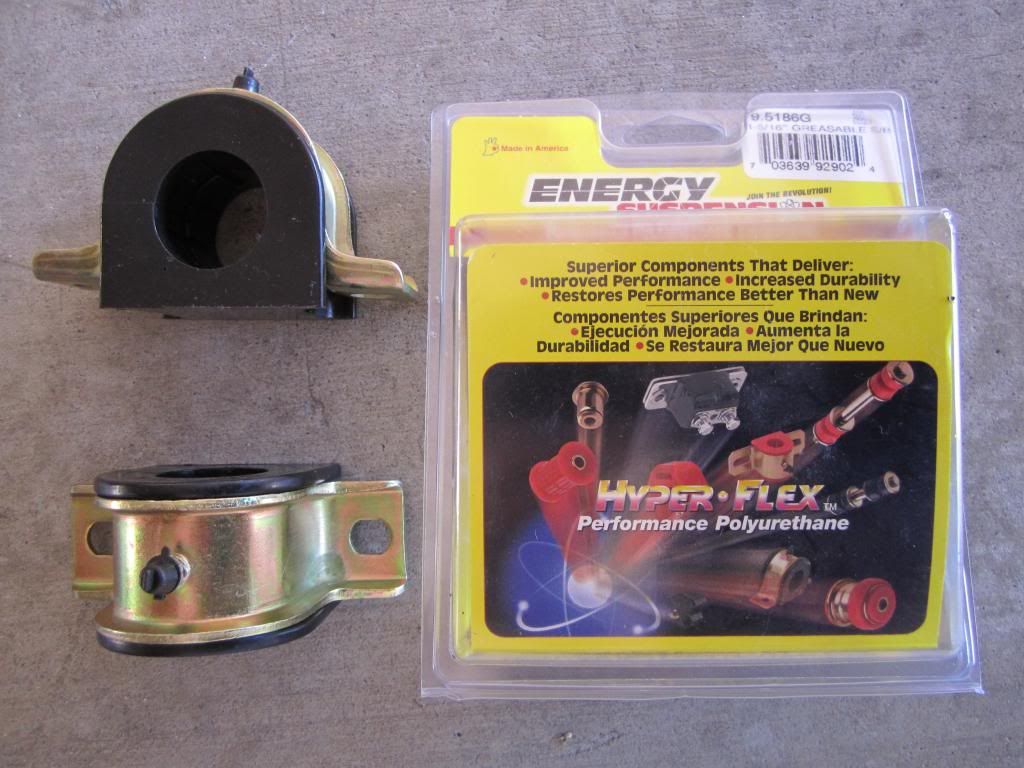
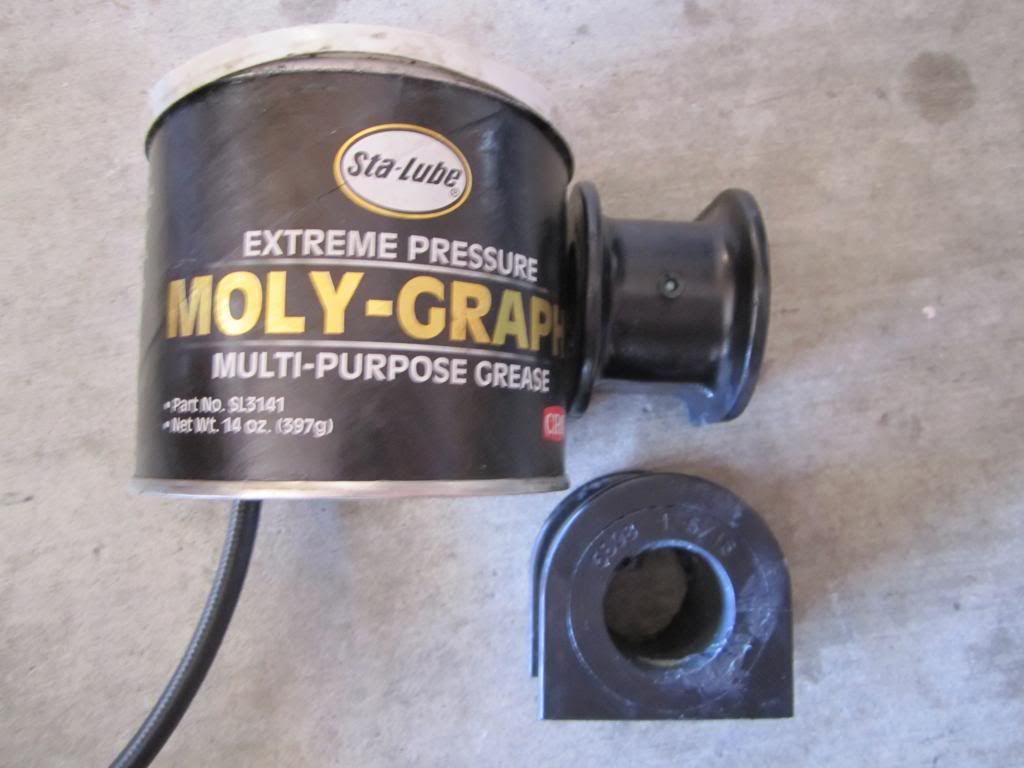
Energy Suspension sway bar bushings 33mm from GenosGarage.com '94-'12 Dodge Ram 33MM Sway Bar Bushings-Geno's Garage
![Image]()
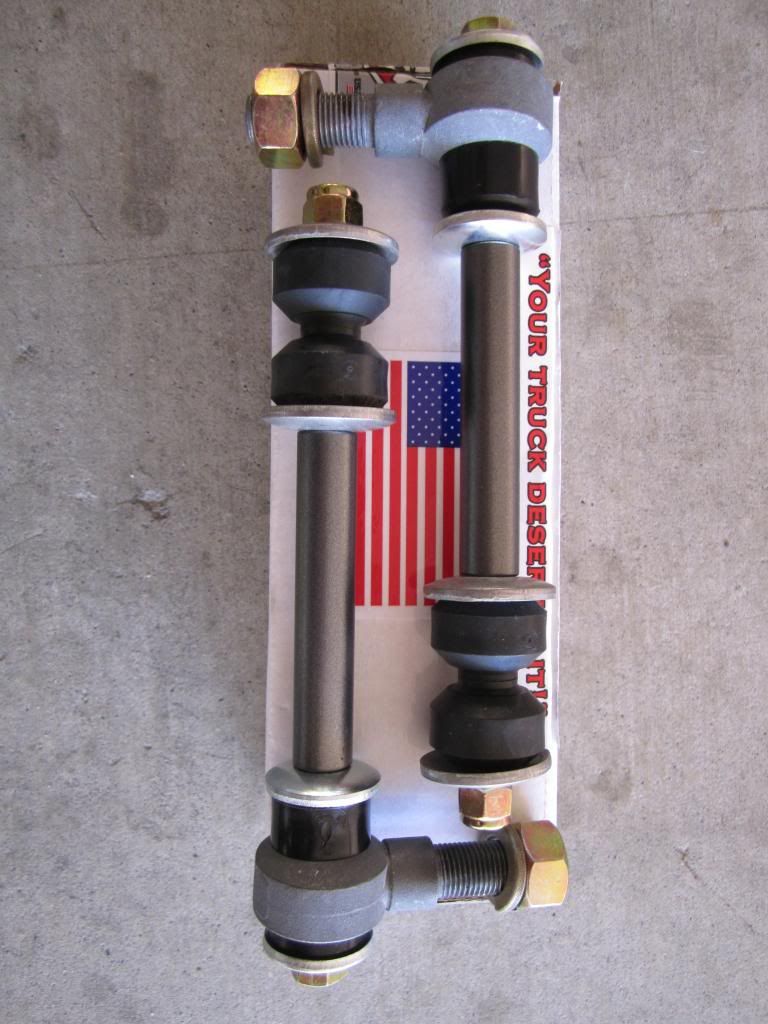
Maxx Suspension end links ( I painted the spacers the same color as my truck) from genosgarage.com Dodge Ram SMX-1311 MAXX Links Sway Bar Links ('11-'12)-Geno's Garage
![Image]()
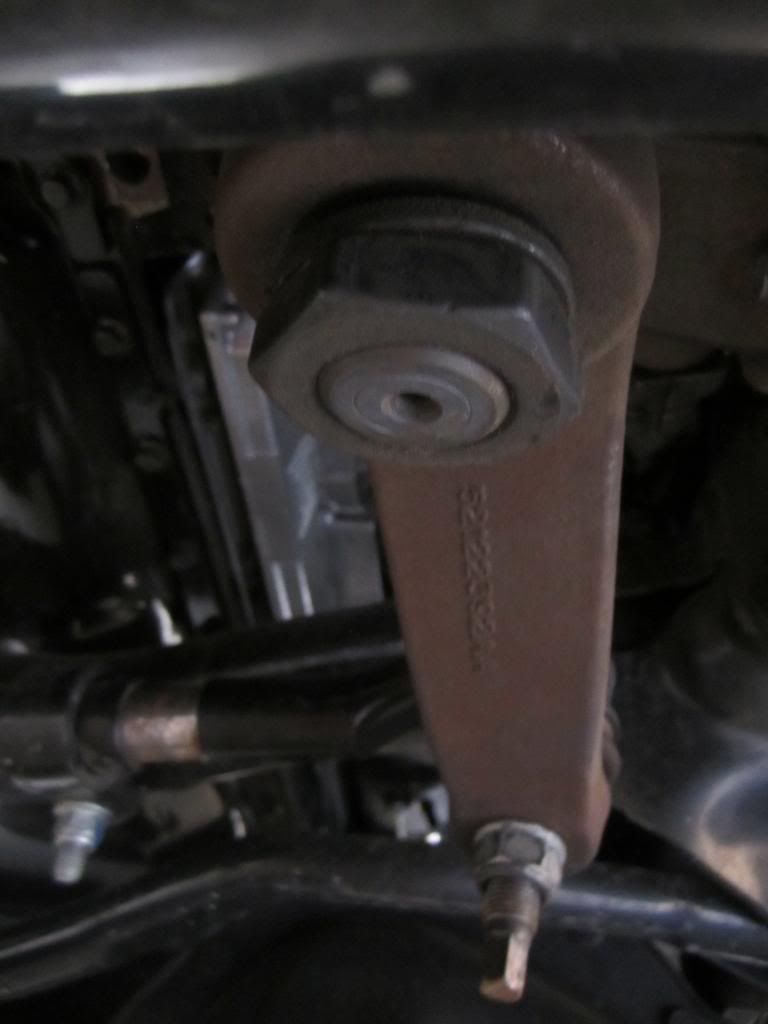
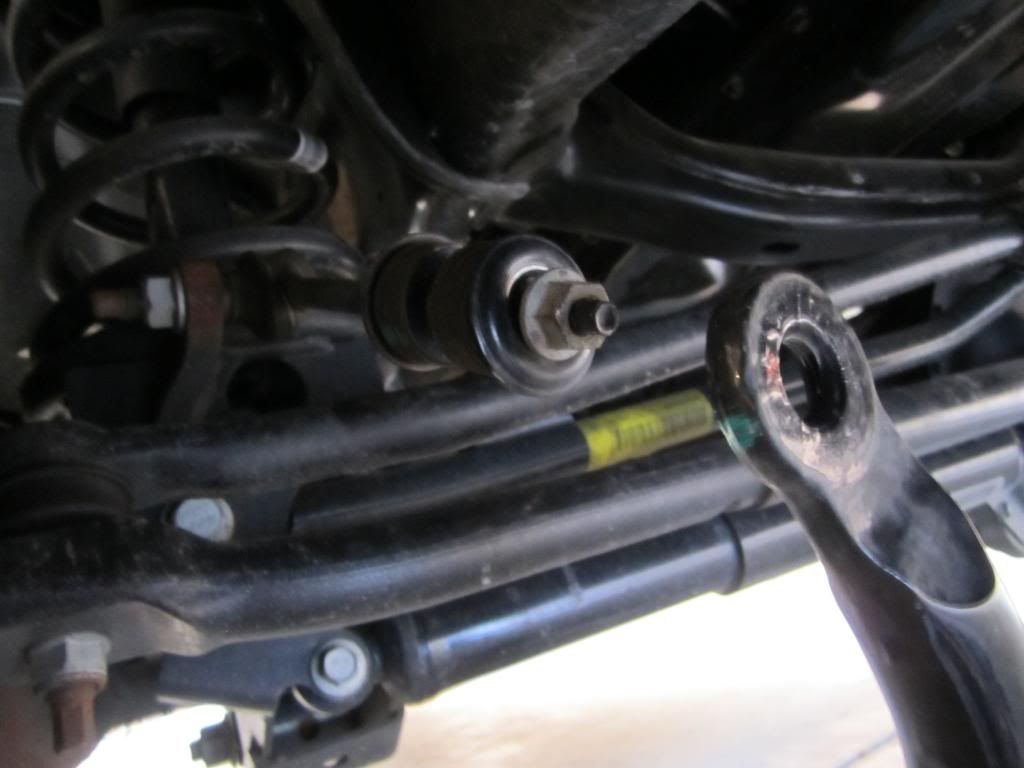
First you must remove the pitman arm nut, I used a 46mm socket but it was loose to begin with and you could probably use an 18" adjustable. You don't need the nut anymore but save the lock washer.
![Image]()
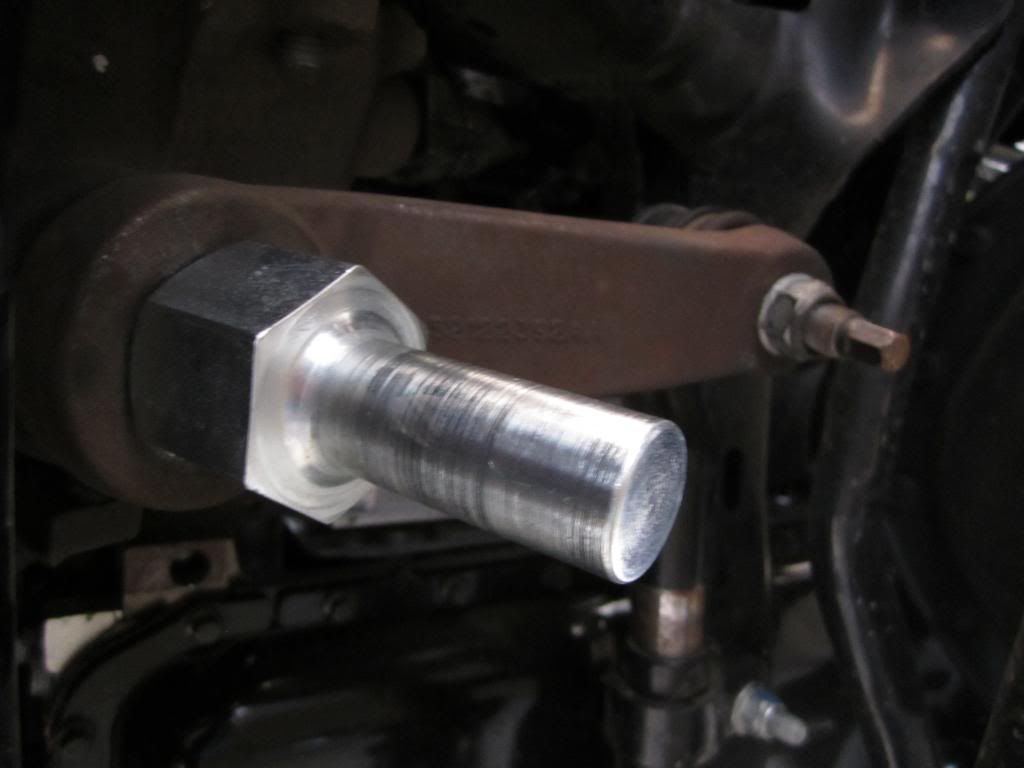
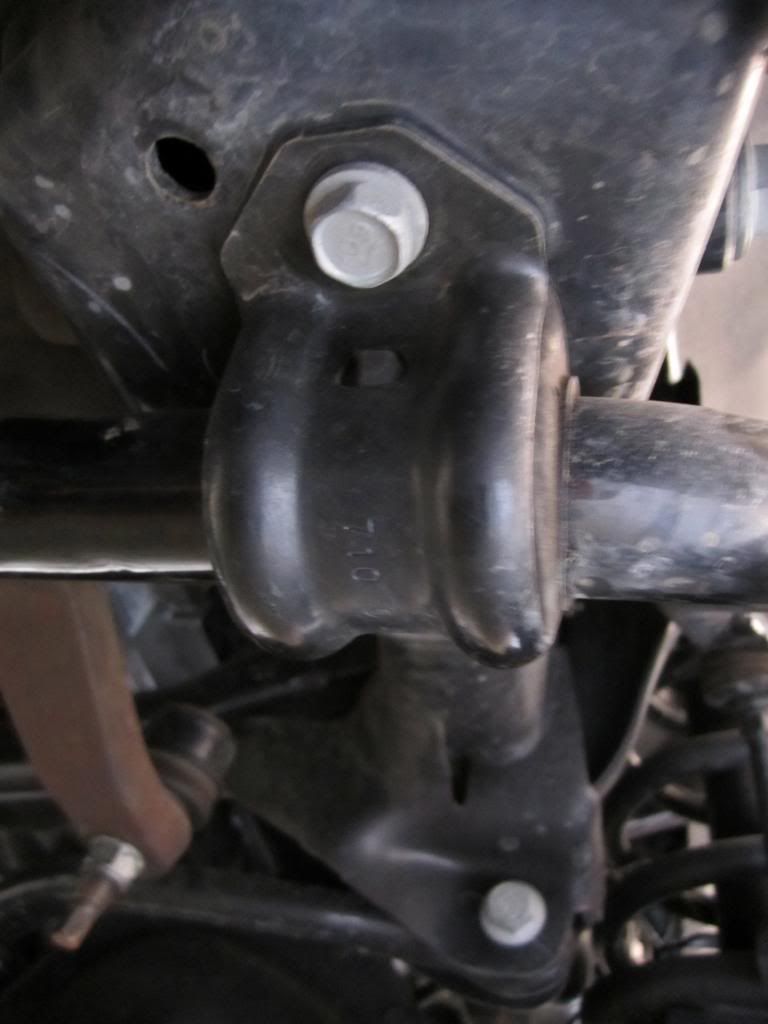
Next, install the supplied pitman arm nut from the PSC brace kit (I used an 18" adjustable to get it tight as possible, you reuse the lock washer from the pitman arm)
![Image]()
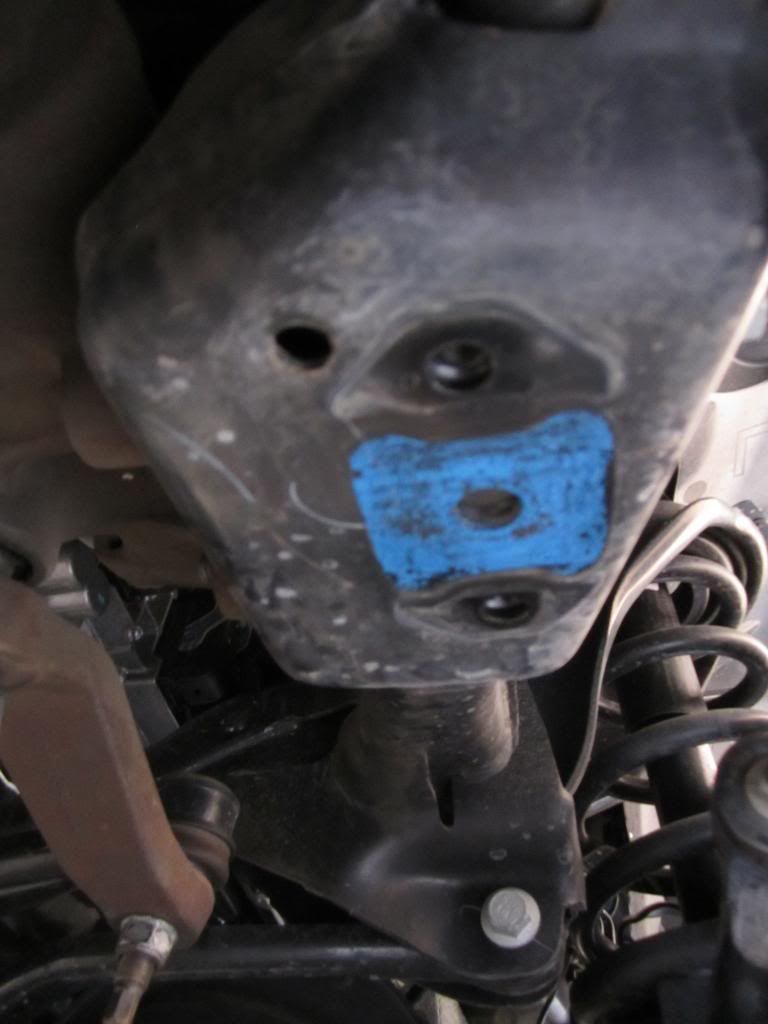
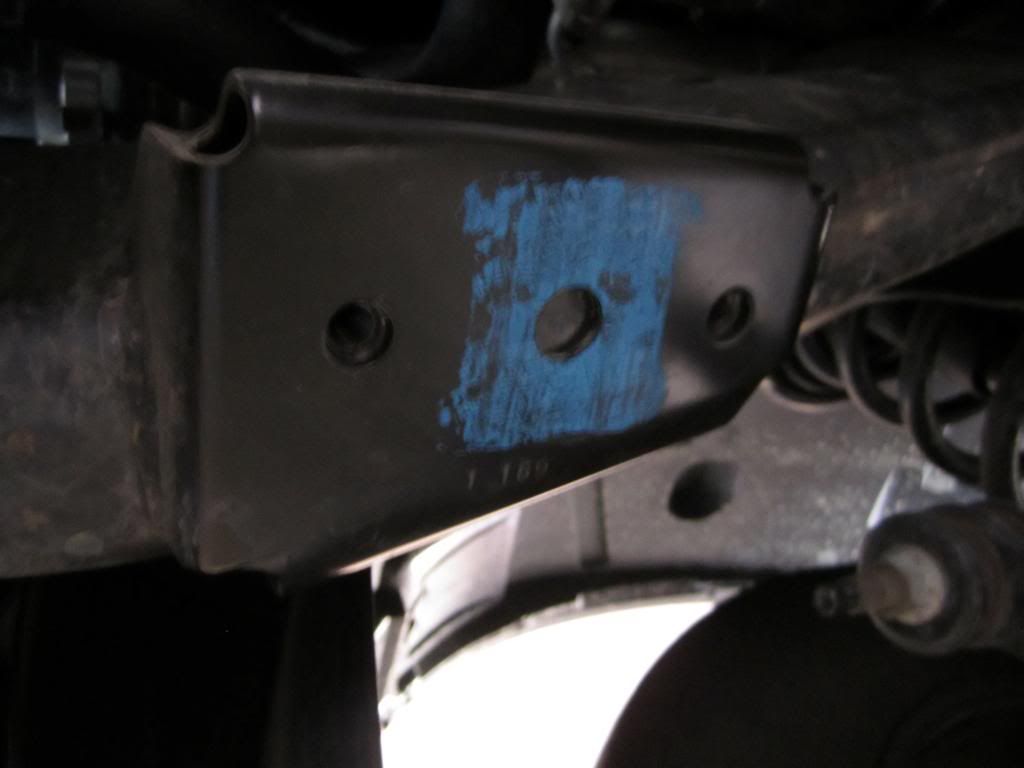
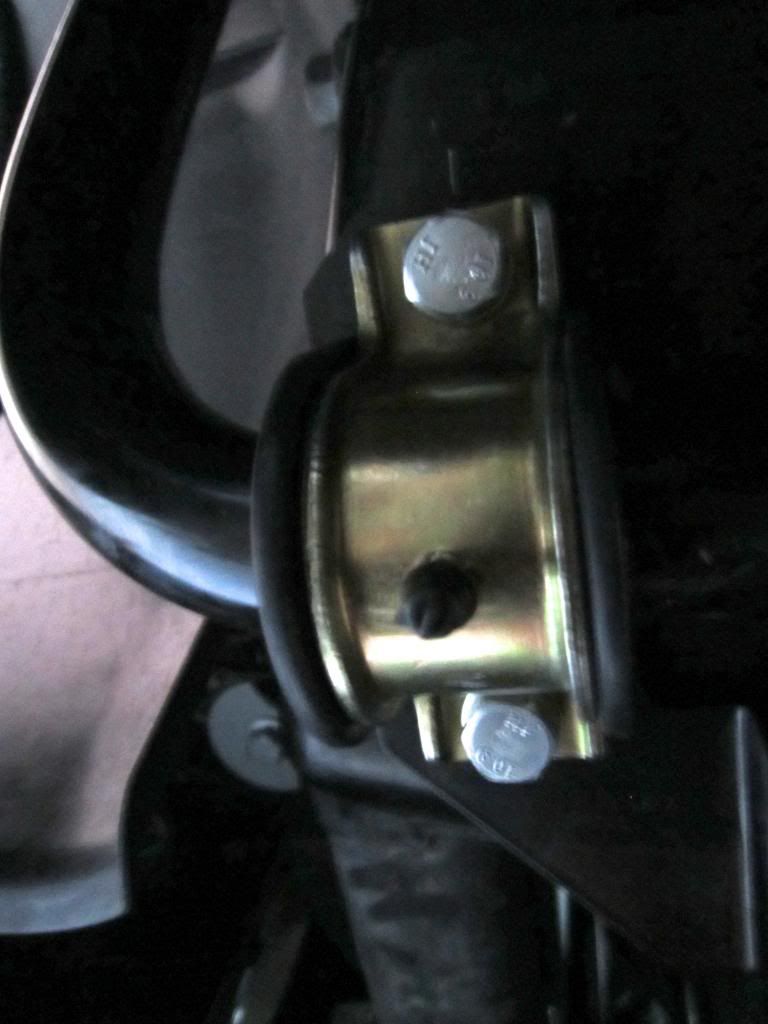
Next, locate the two brackets that attach the sway bar to the frame. It looks like this (use a 15mm or 5/8" socket to remove)
![Image]()
![Image]()
I cleaned it with WD40 while I was at it
![Image]()
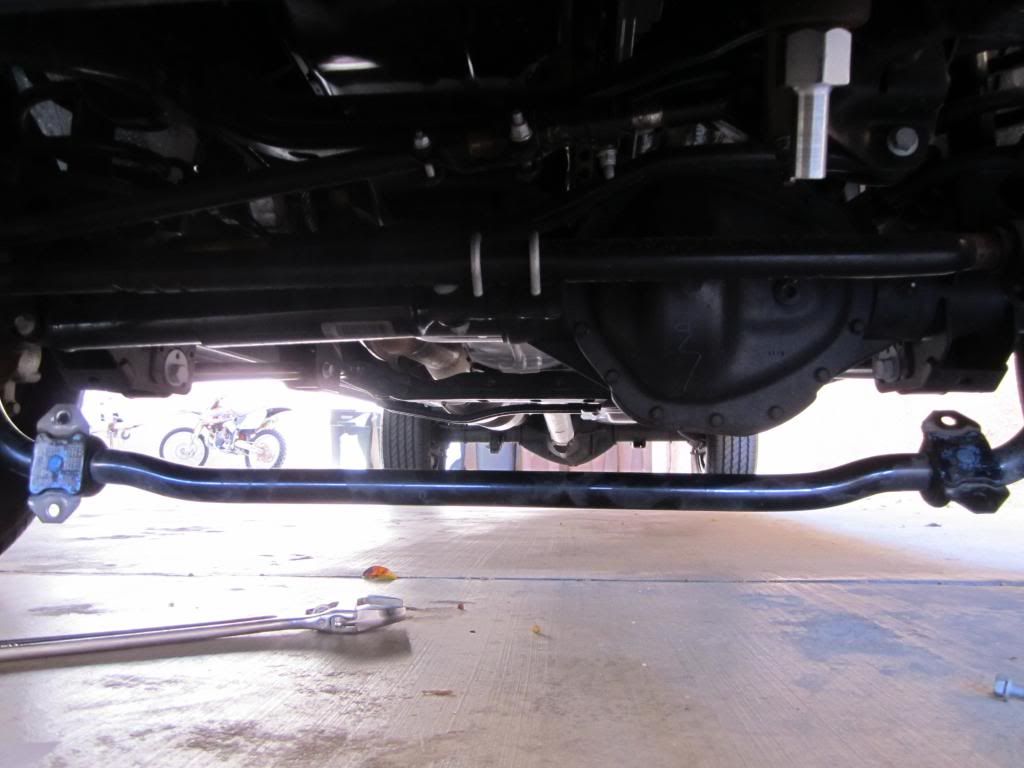
Drop the sway bar slowly, it is pretty heavy. Put something on the ground underneath the sway bar like a blanket or something (prevents scratches if you care)
![Image]()
Disconnect the sway bar from the end links one side at a time. (I re-attached all hardware because I didn't want nuts everywhere getting mixed up and caught in my creeper wheels)
![Image]()
(If your not installing new end links, skip this step) Remove end links one side at a time. You need a 10mm to hold the outside and a 19mm or 7/8" i believe to remove the nut.
![Image]()
Install new end links on both sides, depending one which company you use the install will be different but it is self explanatory. These are the Maxx Suspension end links for 2010+ trucks with no lift.
![Image]()
After I set the sway bar aside, I removed the old sway bar bushings (if you are not installing new bushings then skip this step). I used Energy Suspension bushings. These are grease able with zerks, so i greased them before installation to make things quicker. A good graphite grease is the best IMO
![Image]()
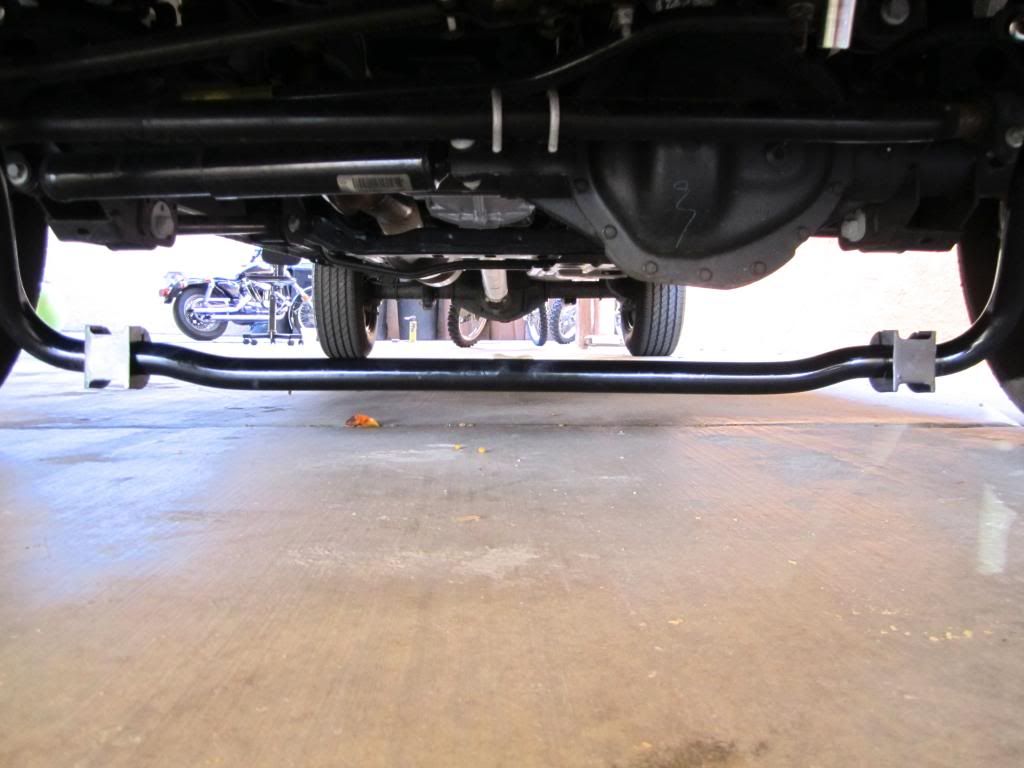
After I installed the new sway bar bushing I mocked everything up on the floor
![Image]()
I went ahead and reattached the sway bar to the end links, and screwed the nut on the end links hand tight (you will need some play room)
![Image]()
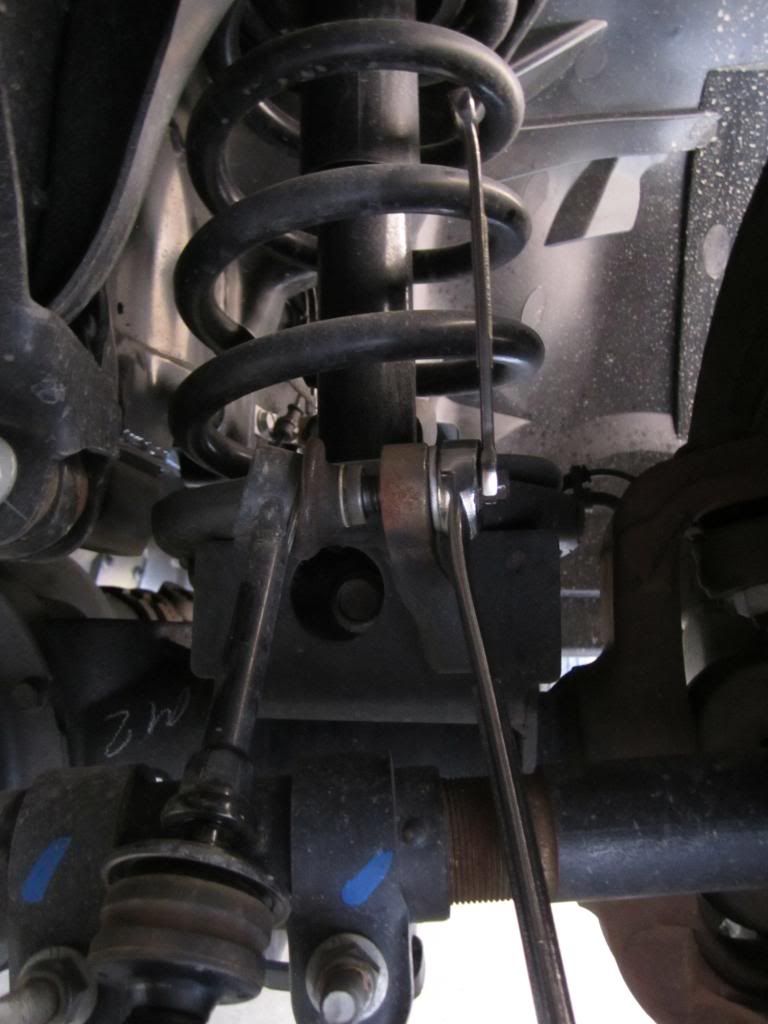
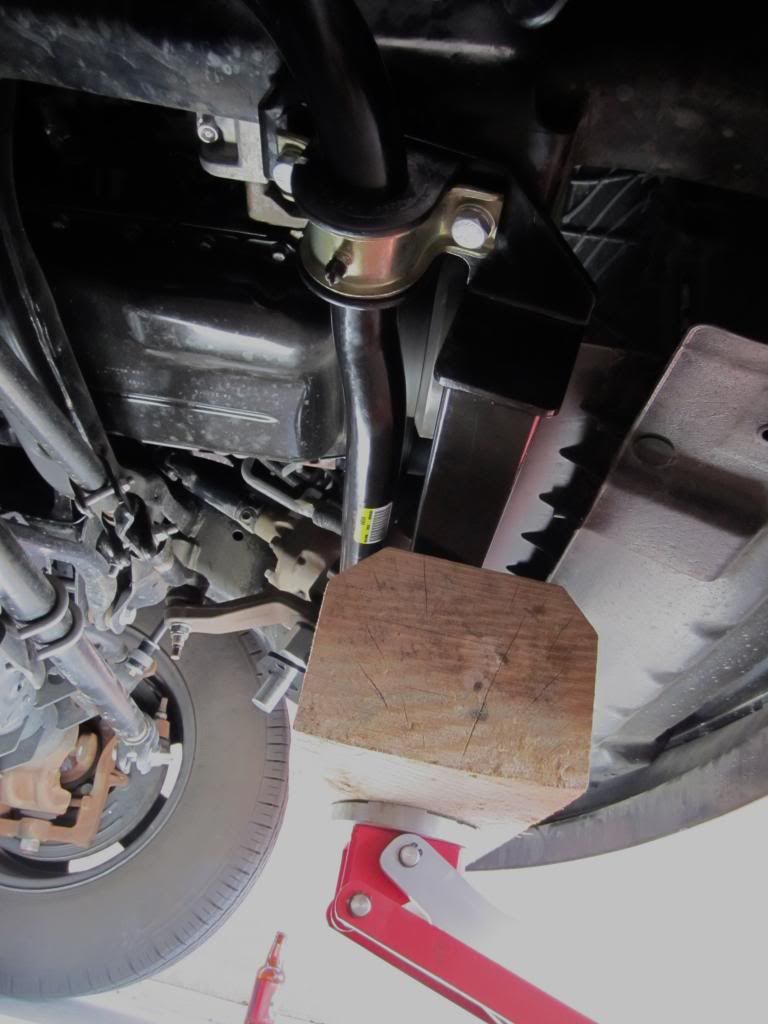
Next is very tricky, and was the most difficult part for me. I did this by myself too. I recommend getting a jack and a block of wood like the picture to aid yourself. You must install both the new brace and the sway bar at the same time, as the bolts for the sway bar bushing hold it in place. I lifted it all together and got one bolt in the passenger side, then I put one bolt in the drivers side. I used the jack to lift everything up and together and shimmied everything into its correct place. I tightened the bolts for the sway bar bushing tight enough to just hold everything up. (note: the sway bar bushing goes on the outside of the brace but the center of the sway bar goes on the inside of the brace)
![Image]()
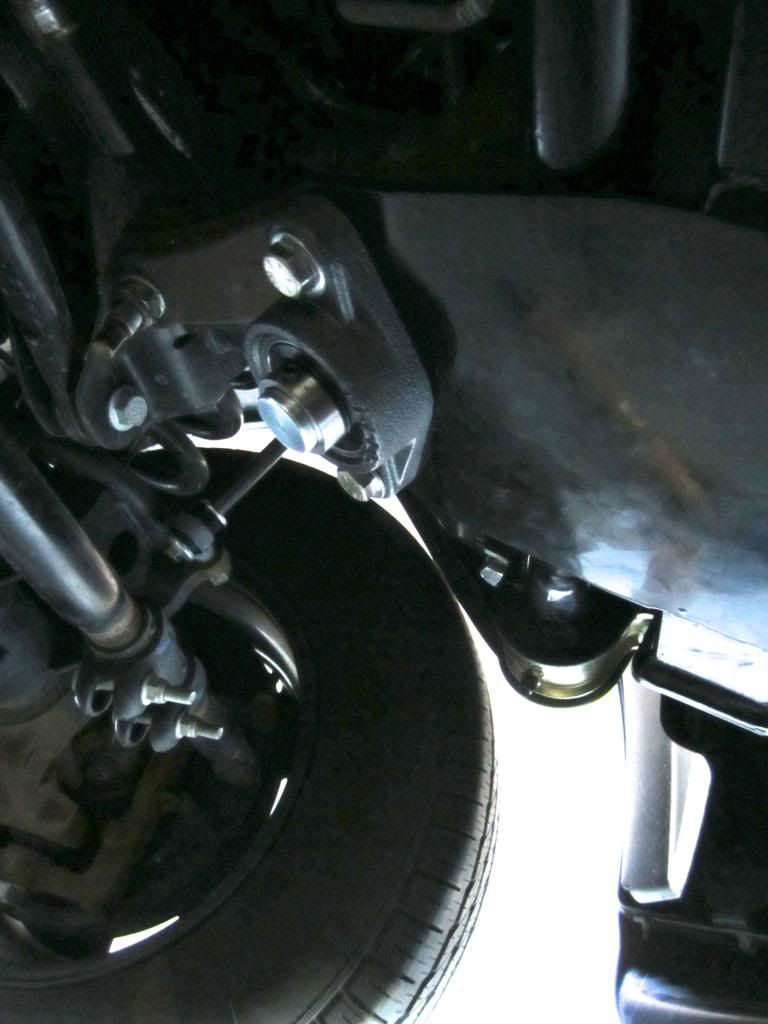
I installed the pitman arm bearing kit and tighten it down to 50 ft lbs. ( there are also 2 small keeper screws, I went ahead and added thread locker to these and tighten them down as much as i could, I also greased the zerk fitting for the bearing with the same graphite grease)
![Image]()
I then tighten all the sway bar bolts to 36 ft lbs. (I didn't grease the zerks because I already packed them with grease)
![Image]()
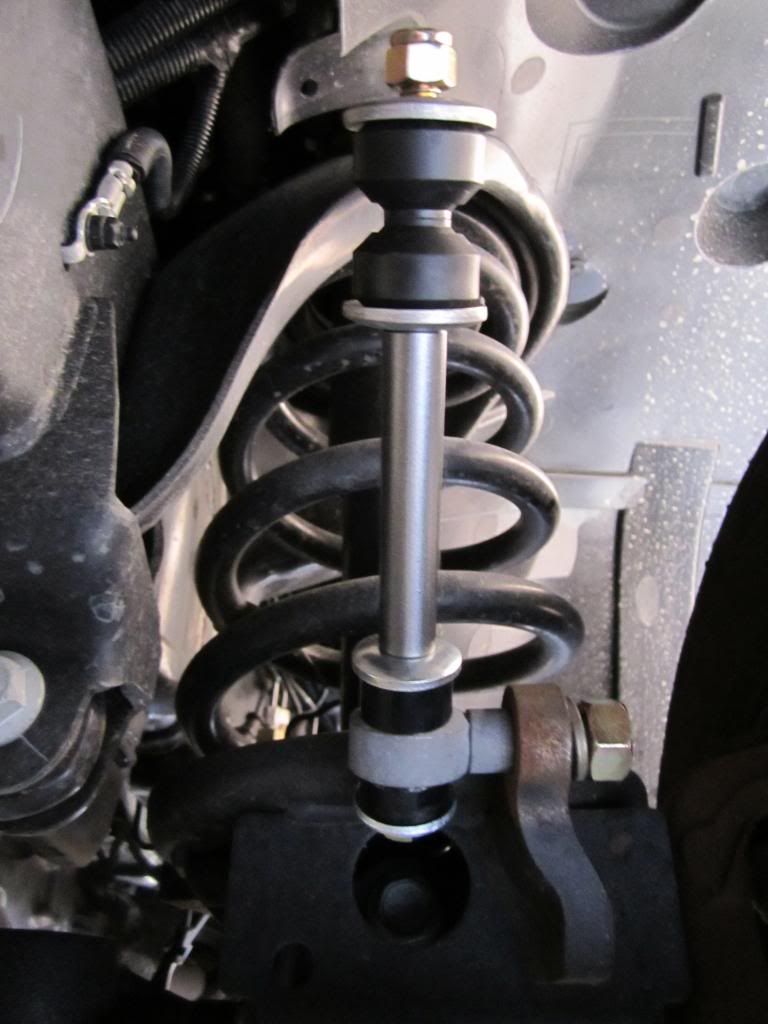
I aligned the end links to the proper position and tighten the vertical bolts first and left about 1/2" of open thread on the top side of the bolt (measured with a caliper) after both vertical bolts ver tight I tighten the horizontal bolts to 60 ft lbs.
![Image]()
Bilstein 7100 steering damper with Thuren damper clamp, got the damper from Carli Dodge Ram Steering Stabilizer - Bilstein 7100 Series Steering Stabilizer for Dodge Ram 2500/3500 and got the clamp direct from Thuren Thuren Fabrication-products
PSC steering brace, direct from PSC Poly Performance JEEP/TRUCK & BUGGY::Steering::Steering Box Braces & Brackets:
odge::Synergy Suspension 94-11 Dodge 4X4 Steering Box Brace 4WD 1500, 2500, 3500 - 4X4 Off-Road Parts, JK Synergy Suspension Systems, Fox Racing Shox, Beard, CNC 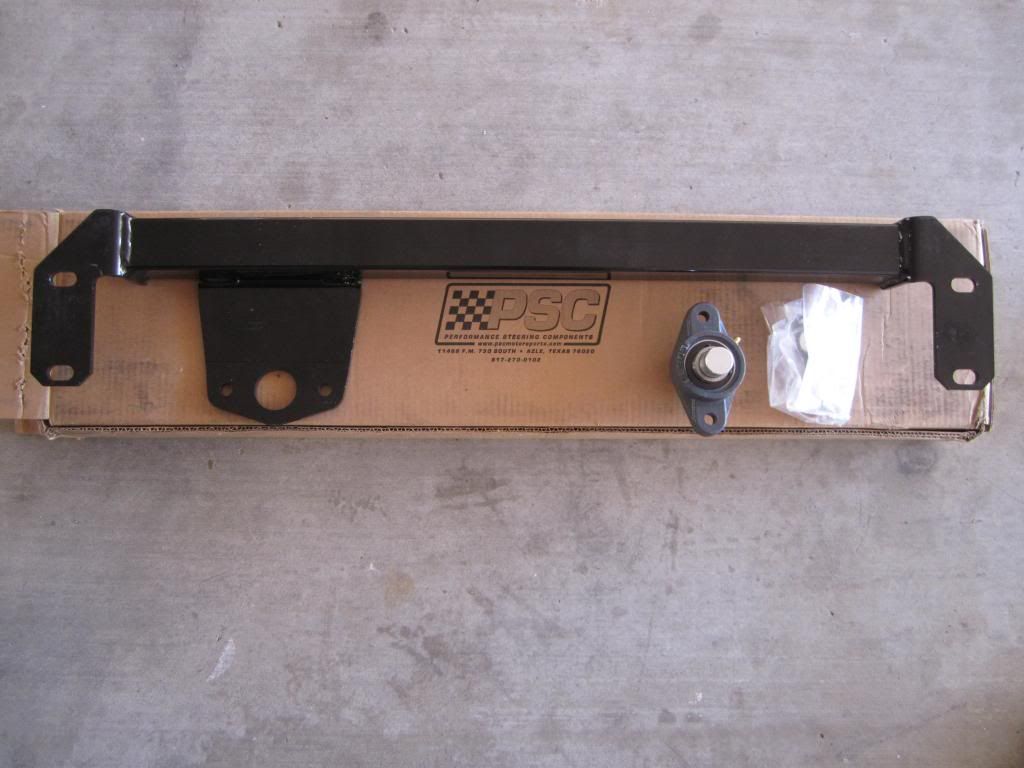
Energy Suspension sway bar bushings 33mm from GenosGarage.com '94-'12 Dodge Ram 33MM Sway Bar Bushings-Geno's Garage
Maxx Suspension end links ( I painted the spacers the same color as my truck) from genosgarage.com Dodge Ram SMX-1311 MAXX Links Sway Bar Links ('11-'12)-Geno's Garage
First you must remove the pitman arm nut, I used a 46mm socket but it was loose to begin with and you could probably use an 18" adjustable. You don't need the nut anymore but save the lock washer.
Next, install the supplied pitman arm nut from the PSC brace kit (I used an 18" adjustable to get it tight as possible, you reuse the lock washer from the pitman arm)
Next, locate the two brackets that attach the sway bar to the frame. It looks like this (use a 15mm or 5/8" socket to remove)
I cleaned it with WD40 while I was at it
Drop the sway bar slowly, it is pretty heavy. Put something on the ground underneath the sway bar like a blanket or something (prevents scratches if you care)
Disconnect the sway bar from the end links one side at a time. (I re-attached all hardware because I didn't want nuts everywhere getting mixed up and caught in my creeper wheels)
(If your not installing new end links, skip this step) Remove end links one side at a time. You need a 10mm to hold the outside and a 19mm or 7/8" i believe to remove the nut.
Install new end links on both sides, depending one which company you use the install will be different but it is self explanatory. These are the Maxx Suspension end links for 2010+ trucks with no lift.
After I set the sway bar aside, I removed the old sway bar bushings (if you are not installing new bushings then skip this step). I used Energy Suspension bushings. These are grease able with zerks, so i greased them before installation to make things quicker. A good graphite grease is the best IMO
After I installed the new sway bar bushing I mocked everything up on the floor
I went ahead and reattached the sway bar to the end links, and screwed the nut on the end links hand tight (you will need some play room)
Next is very tricky, and was the most difficult part for me. I did this by myself too. I recommend getting a jack and a block of wood like the picture to aid yourself. You must install both the new brace and the sway bar at the same time, as the bolts for the sway bar bushing hold it in place. I lifted it all together and got one bolt in the passenger side, then I put one bolt in the drivers side. I used the jack to lift everything up and together and shimmied everything into its correct place. I tightened the bolts for the sway bar bushing tight enough to just hold everything up. (note: the sway bar bushing goes on the outside of the brace but the center of the sway bar goes on the inside of the brace)
I installed the pitman arm bearing kit and tighten it down to 50 ft lbs. ( there are also 2 small keeper screws, I went ahead and added thread locker to these and tighten them down as much as i could, I also greased the zerk fitting for the bearing with the same graphite grease)
I then tighten all the sway bar bolts to 36 ft lbs. (I didn't grease the zerks because I already packed them with grease)
I aligned the end links to the proper position and tighten the vertical bolts first and left about 1/2" of open thread on the top side of the bolt (measured with a caliper) after both vertical bolts ver tight I tighten the horizontal bolts to 60 ft lbs.