
Introduction:
Installation:
Review:
I've had the thought of installing a light bar on my truck for a couple months now. Of course my main concern was being able to install it as cleanly as possible and make it look like it's meant to be there just like most of the other mods on my truck. I wasn't at all interested in roof light bars or having it stick out of the bumper 4 inches... nothing like that. I determined that the only way I wanted to do it is if I could fit a 30" curved bar in between the tow hooks. I want to keep the tow hooks just in case something happens where I do need them. Whether that be someone pulling me out or me pulling someone else out.
All the initial research I had done was full of guys saying you can't fit a curved 30" bar in between the tow hooks, it's too wide. Finally I found a post where I guy notched his tow hooks and bolted the bar directly do it. That was the exact option I was looking for.
I also wasn't at all interested in spending $1200 for a Rigid bar. IMO those are completely over priced and in no way worth that kind of money. I ended up talking to Brandon Joslin (iRIDElow) who's running a number of off brand LED light bars and asked him what his opinion on them was VS Rigid. He straight up told me that if you took name off the Rigid bar you would not be able to tell the difference between it and the off brand. That combined with some other research I had done finding posts where they had been standing up very well had me sold. So a bar became the number one thing on my Christmas list and I was fortunate enough to get it.
Installation:
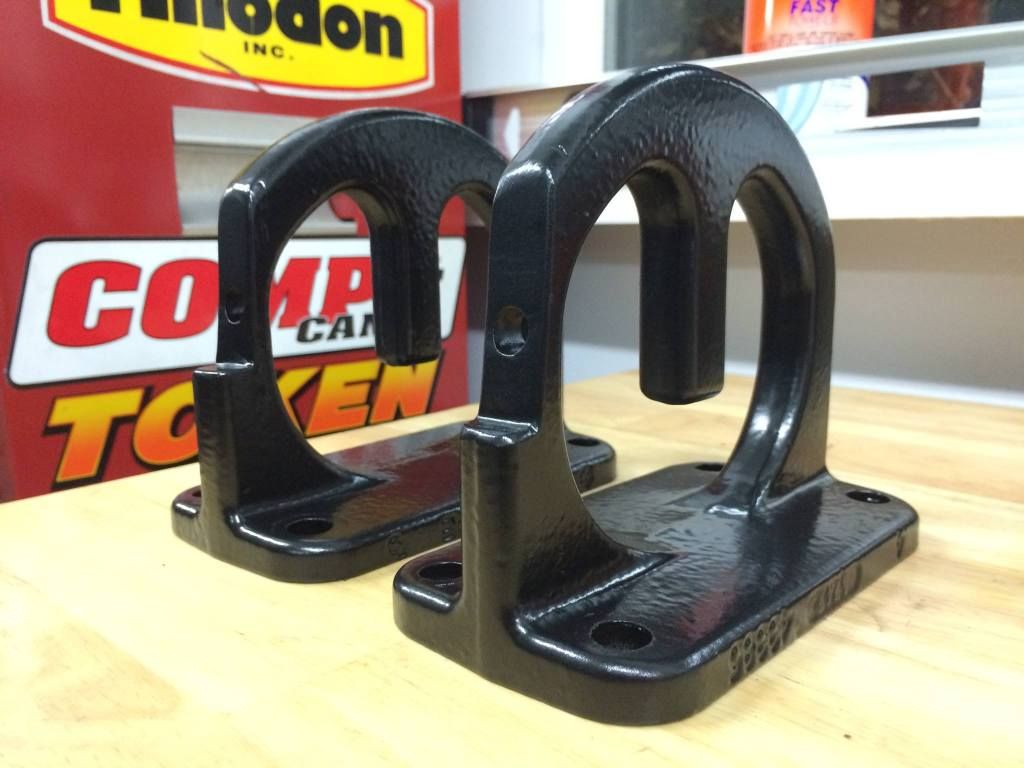
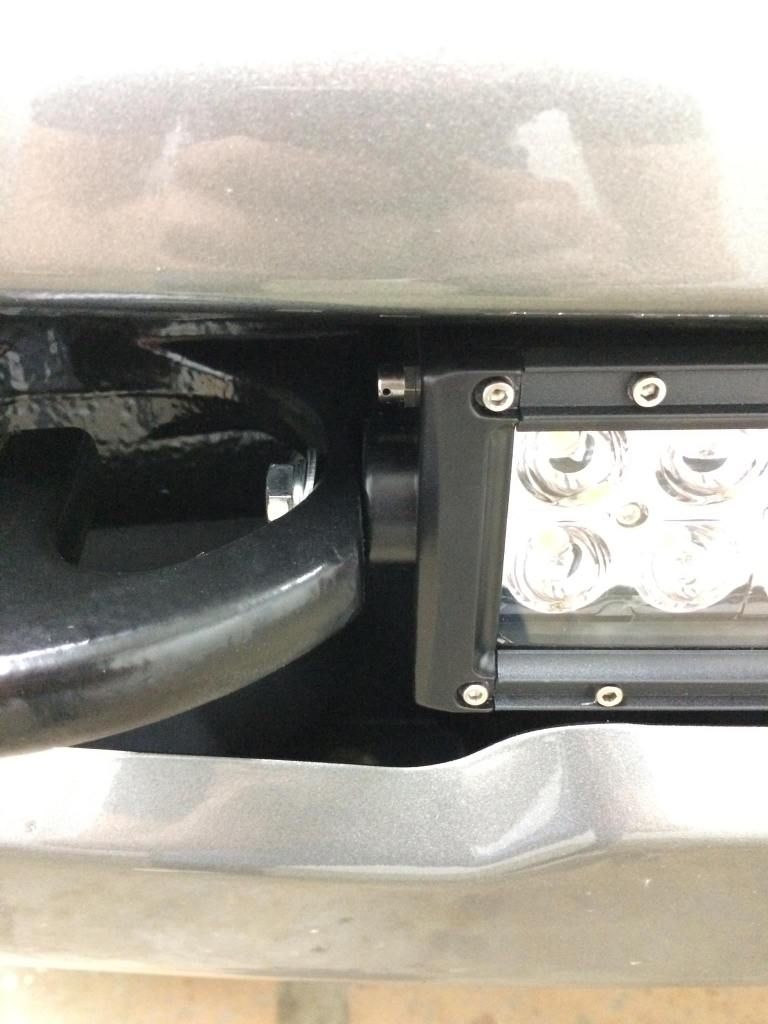
Tow hooks
I started off by taking some exact measurements of the distance between the tow hooks in the location I wanted to mount the bar and the overall width of the bar at the mounting points. I then removed 1 tow hook and slid the bar into the bumper to find what my mounting depth needed to be to determine where I needed to notch the tow hook and drill the hole. For my particular light bar I determined that I needed to remove 7/16" from each tow hook and drill the hole 2 1/4" forward of the flat surface of the hook. I then made a template giving me the rough angle of the mounting point on the light bar and started drawing my cut lines on the tow hook.
To cut the main pieces out of the tow hook I used a pneumatic die grinder with a cut off wheel on it. Once I had the main piece cut off I marked where my whole needed to be drilled and center punched it. I attempted to drill through with a hand held drill but there was no way that was going to happen. I broke 3 drill bits in about 5 minutes of trying and then determined I needed a drill press. I whipped down to my Uncle's shop and through it on his press to do it. Worked like a charm; a drill press will definitely be my next investment as far as shop equipment goes. I drilled the hole about 4 sizes bigger than it actually needed to be for the bolt to give me some adjustability and movement to get the light bar sitting straight when I installed it.
Back at my shop I began to test fit everything together on my workbench and found out that I needed to grind the mounting surface of each tow hook slightly to match the angle of the light bar mounting point better. After about 15 minutes I had it sitting about perfect so I cleaned up all the edges with a small grinding wheel and the main modification was done. From there I just threw a couple coats of primer on them and then a few coats epoxy based paint.
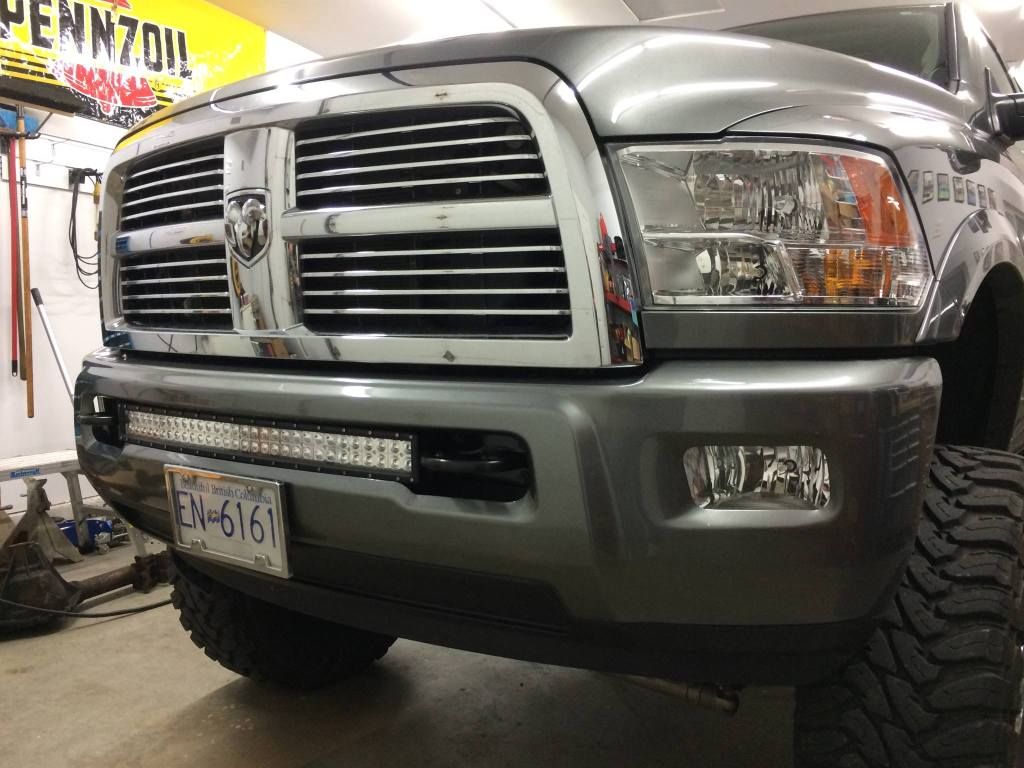
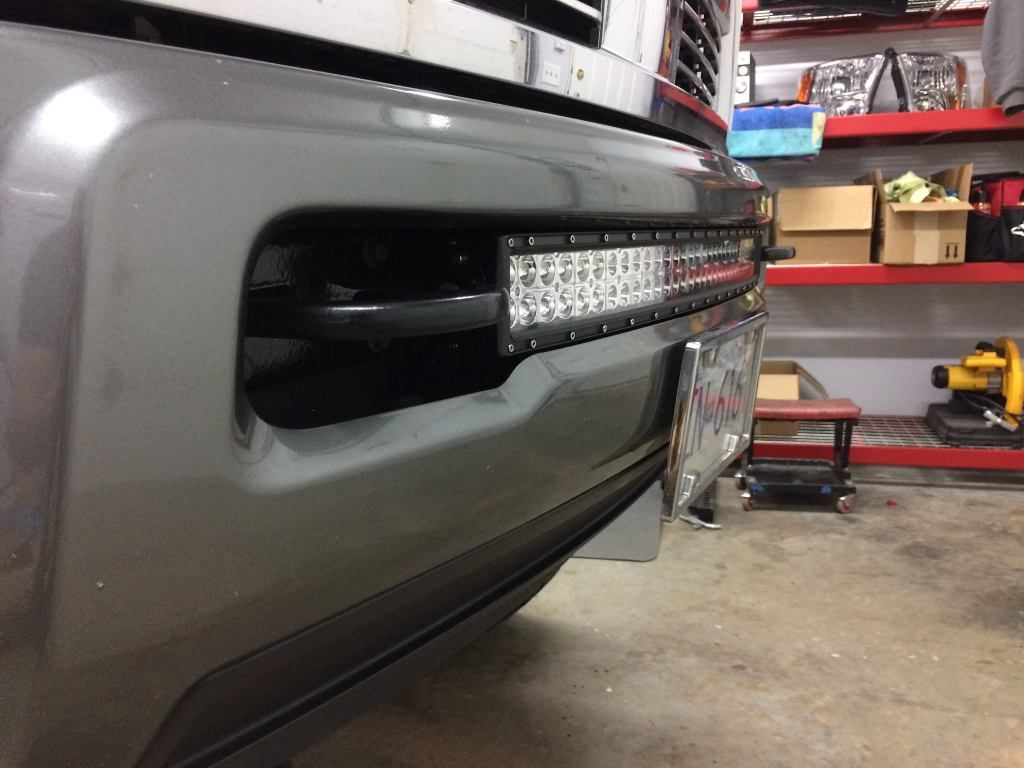
Light bar
After that the installation of the light bar itself was fairly straight forward. Bolted the tow hooks back onto the truck and then put the light bar right in place and bolted it up. It's sitting pretty much exactly where I wanted it to and almost matches the curve of the bumper perfectly. I'm very happy with the look and fitment of it.

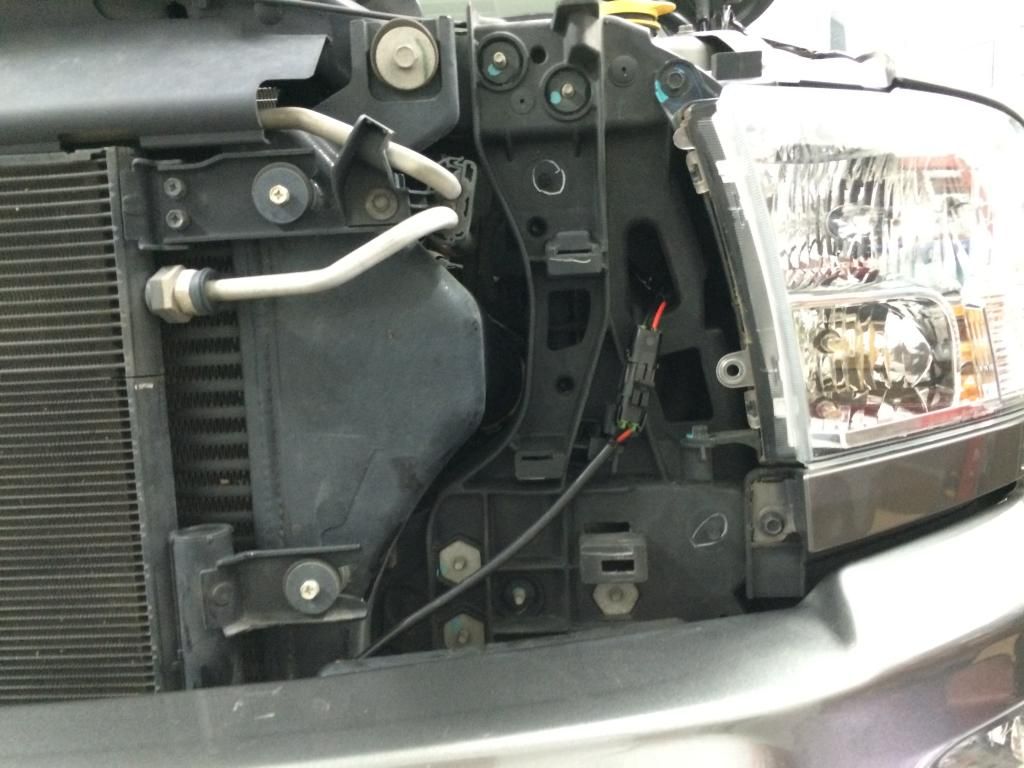
Wiring
To wire it up I used a good chunk of the relay harness that came with the light bar. I modified it slightly and put a weather proof connector just behind the grill incase I never need to remove the light bar. I mounted the relay right beside the TIPM and ran the power directly to the battery and then ran the wiring nicely along the inside of the fender and through a grommet in the clutch pedal block off plate into the truck. For now I just have it hooked up with the push button switch that came with it but I have ordered a few switches from Otrattw, one of which will be for the light bar. When I get that I'll be installing the switch right on the side of my console for easy access.

I started off by taking some exact measurements of the distance between the tow hooks in the location I wanted to mount the bar and the overall width of the bar at the mounting points. I then removed 1 tow hook and slid the bar into the bumper to find what my mounting depth needed to be to determine where I needed to notch the tow hook and drill the hole. For my particular light bar I determined that I needed to remove 7/16" from each tow hook and drill the hole 2 1/4" forward of the flat surface of the hook. I then made a template giving me the rough angle of the mounting point on the light bar and started drawing my cut lines on the tow hook.
To cut the main pieces out of the tow hook I used a pneumatic die grinder with a cut off wheel on it. Once I had the main piece cut off I marked where my whole needed to be drilled and center punched it. I attempted to drill through with a hand held drill but there was no way that was going to happen. I broke 3 drill bits in about 5 minutes of trying and then determined I needed a drill press. I whipped down to my Uncle's shop and through it on his press to do it. Worked like a charm; a drill press will definitely be my next investment as far as shop equipment goes. I drilled the hole about 4 sizes bigger than it actually needed to be for the bolt to give me some adjustability and movement to get the light bar sitting straight when I installed it.
Back at my shop I began to test fit everything together on my workbench and found out that I needed to grind the mounting surface of each tow hook slightly to match the angle of the light bar mounting point better. After about 15 minutes I had it sitting about perfect so I cleaned up all the edges with a small grinding wheel and the main modification was done. From there I just threw a couple coats of primer on them and then a few coats epoxy based paint.

Light bar
After that the installation of the light bar itself was fairly straight forward. Bolted the tow hooks back onto the truck and then put the light bar right in place and bolted it up. It's sitting pretty much exactly where I wanted it to and almost matches the curve of the bumper perfectly. I'm very happy with the look and fitment of it.


Wiring
To wire it up I used a good chunk of the relay harness that came with the light bar. I modified it slightly and put a weather proof connector just behind the grill incase I never need to remove the light bar. I mounted the relay right beside the TIPM and ran the power directly to the battery and then ran the wiring nicely along the inside of the fender and through a grommet in the clutch pedal block off plate into the truck. For now I just have it hooked up with the push button switch that came with it but I have ordered a few switches from Otrattw, one of which will be for the light bar. When I get that I'll be installing the switch right on the side of my console for easy access.


Review:
The light output of this bar is phenomenal! It has met all my expectations and then some. When I pulled my truck out of the shop last night with all the lights off and then turned on the bar my Dad and I just started laughing at how bright it is. It lights up everything from the ground 3 feet in front of the truck to the tops of the trees. When I came home last night I turned it on when I first turned onto my street and lit up the yellow caution sign at the end of the street approximately 2150ft (650m) away. Pictures don't do it justice but here's a couple that I took.

Top: low beams only (5000K HID)
Middle: low beams and fog lights (5000K HID)
Bottom: low beams, fog lights, and light bar.

Obviously that last one is just in back backyard outside the shop. I'll get some more comparison shots on the open road when I get a chance. Seeing the output of this light bar as definitely convinced me to put some LED pods on the back end to use as backup lights or load lights in dark areas. I ordered the switch for them already and will hopefully be looking to get a set shortly once I determine how and where I'm going to install them.
")


